
So you’re looking at buying a Cricut machine. Or maybe you’ve already got one and aren’t sure what else you need to get started. Don’t worry, all Cricut users were brand new once and I’m here to help! Let’s take a look at the tools, equipment, and supplies you’ll need to get started with your new Cricut machine.
A quick note: I’ve included links to all products recommended in this post from the Cricut shop. If you click through any of those links, be sure to choose your Country from the Cricut shop website before ordering.

This post may contain affiliate links, which means that I may earn a commission on any sales at absolutely no extra cost to you. Review our Policies for more info.
Cricut Equipment
Cricut Machine
The number one priority on the list is getting the Cricut machine itself. There are a few different makes and models of Cricut machines available; which one you get will depend on your budget and what you intend to make with it.
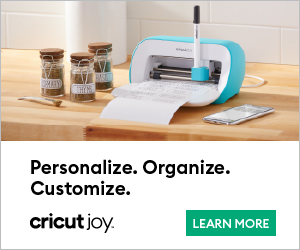
Cricut Joy
The Cricut Joy is the smallest machine designed for its compact size and portability. It’s the most affordable option but with limitations on the width of materials that you can cut (max of 5.5″ wide but up to 20′ long). This machine can’t use all of the accessory tools that are available (only the writing and cutting tools) or all of the different material types.
Cricut Explore Air Series
The Cricut Explore series has 3 versions (1, 2, & 3) and is the mid-level machine. I’ve had the Explore Air 2 for 4 years and have created thousands of projects. These machines are limited to 12″ wide materials; 1 & 2 are limited to a length of 24″ but the newest Explore 3 can handle materials up to 12′ long. They can use a few more accessory tools than the Cricut Joy and twice as many materials.

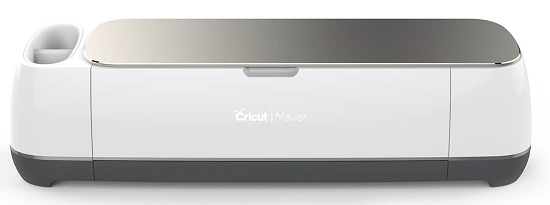
Cricut Maker Series
This machine has 2 models (Maker & Maker 3) and is the professional level machine at the highest price point. Both are limited to 12″ wide materials; the original Maker is limited to lengths of 24″ while the Maker 3 can handle materials up to 12′ long. These machines have the largest selection of accessory tools and can be used with three times as many materials as the Explore series. It cuts the fastest, deepest, and the most intricate of materials.
Cricut EasyPress
If you want to create things such as custom t-shirts, tote bags, robes, stockings, or anything else on fabric, you will need a heat press. This allows you to apply the the heat and pressure needed for iron-on vinyl (also known as heat transfer vinyl or HTV). Traditional heat presses are fairly industrial; they are extremely heavy, bulky, expensive, and take a long time to heat up. If you’re looking to run a professional t-shirt business where you make shirts in bulk, then a traditional heat press is likely the right equipment for your business. But if you’re looking to start out with something smaller, cheaper, more portable & storable and will be using it less frequently, then the Cricut EasyPress is perfect.
The Cricut EasyPress is a manual version of a heat press. This means that it’s up to you to provide the pressure by pushing down on the handle while applying heat to your item. It heats up very quickly and takes up little space in your craft room. It comes in 3 sizes:
- Cricut EasyPress Mini: this tiny tool is perfect for adding details to small or irregularly shaped objects such as stuffed animals, shoes, or hats.
- Cricut EasyPress 9×9: This press has a 9×9″ heat plate and can be used to make most items. If your design is larger than 9″, you can usually press in sections to get full coverage. This takes extra time and care so if you’ll be frequently pressing larger designs, you may want a larger press.
- Cricut EasyPress 12×10: With a 12×10″ heat plate, this press is best for larger items like adult shirts and blankets.

Cricut EasyPress Accessories
If you get an EasyPress, you’ll also need an EasyPress mat to go with it. This gives you a firm, heat resistant surface to press against. It will help with getting a good, consistent heat and pressure onto your material for the best results while protecting your craft table from the heat. The mats come in multiple sizes; choose a size at least as big as your EasyPress.
If you’re only looking to make very occasional items for a hobby and not a business, you can also use a home iron to apply heat and pressure. Not looking to make these types of items? Then you can forget about a heat press and just stock up on what you do need!
Cricut Tools
Now that you have a Cricut machine, you’ll need a few other tools and accessories to get started with those Cricut projects.
Cricut Mats
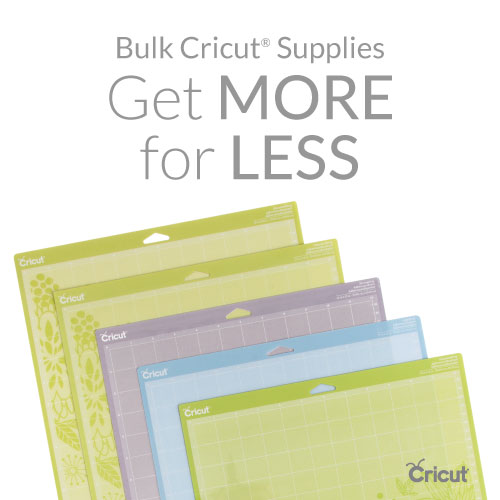
To use most materials with your Cricut, you need to stick the material onto a mat before feeding it into the machine. These mats come in four types of stickiness and two lengths (12″ or 24″). (Since the Cricut Joy is a smaller machine, it has its own mat sizes.) If you have one of the newest models (Cricut Joy, Explore 3, or Maker 3), there are Smart Materials that you can cut without a mat, but I’d recommended grabbing some mats for other projects. The four types of mats are:
- LightGrip Mat (BLUE) – for thinner materials like paper and light cardstock
- StandardGrip Mat (GREEN) – for heavy cardstock, vinyl, and iron-on vinyl/HTV
- StrongGrip Mat (PURPLE) – specialty cardstocks (i.e. glitter), matboard, & specialty vinyl (i.e. StripFlock)
- FabricGrip Mat (PINK) – used to cut most fabrics using the Rotary Blade or Bonded-Fabric Blades
I don’t cut fabric but I do cut a variety of vinyl types and cardstocks. I keep a stock of the blue, green, & purple mats on hand. For most projects, I use the green mat in 12″ size so I have the most of that mat size.
Machine Tools
Working with different materials and projects may require using different tools with your Cricut. There are a variety of blade types, scoring and engraving tools, writing utensils, and so on. You insert these tools into the Cricut accessory adaptors for the machine to use for cutting/drawing on your material. Remember that not all tools are compatible with all Cricut machines so be sure to check the compatibility of a tool before purchasing.
To start, I’d recommend just getting the standard blade (Premium Fine-Point blade). It will cut most light-mid weight materials such as paper and vinyl. (Note that your machine will likely come with this blade already.)
Handheld Tools
You’ll want to grab a few handheld crafting tools as well to help complete your projects once the Cricut machine has done its part. I would highly recommend a weeding tool and scraper (plus scissors, which you likely already have in your crafting arsenal). The weeding tool has a sharp tip that helps you remove parts of the cut material that you don’t need. The scraper can be used to stick materials to your mat (and remove them) and for smoothly applying the material onto your project.

Materials
Cricut machines can work with such a large variety of materials that you can’t possibly stock up on all of them at once. Think about the types of projects you’d like to make and what materials you’ll need to do so. That will help you choose which materials to grab to get started with your Cricut crafts.
For creating greeting cards and party decorations, you’ll mostly be working with paper and cardstock. For designs that are printed right onto the material instead of sitting on top, try out Infusible Ink. The Cricut Maker can also cut fabric, leather, felt, aluminum, thin basswood, and more.
One of the most versatile materials is vinyl. Let’s take a look at the different types and what you’ll need them for.
Vinyl Types
There are two main types of vinyl: adhesive vinyl and heat transfer vinyl (also known as iron-on vinyl or HTV). Adhesive vinyl has an adhesive backing for sticking directly onto surfaces. Heat transfer vinyl has an adhesive backing that is activated with heat. Both types are available in a huge variety of colours plus various finishes including prints, glitter, chrome, foil, and so on.
Adhesive vinyl is typically used on hard surfaces such as mugs and tumblers. It can also be used to make stencils, wall decals, and more. There are two main versions of adhesive vinyl: permanent and removable.
Permanent Vinyl (Oracal 651)
Permanent vinyl has a heavy duty adhesive that is meant to last on the surface it’s applied to for years. If you’re looking to add a permanent design onto something, this is the vinyl type you’ll need. Think of projects like mugs, tumblers, ring dishes, Christmas ornaments, etc. It can stand up to hand-washing and regular use.
One of the main vinyl manufacturers in the market is Oracal so many crafters use and refer to their products by name. Oracal’s version of permanent adhesive vinyl is called Oracal 651. If you’re shopping from a local vinyl supplier, look for this name when shopping for permanent vinyl.
Removable Vinyl (Oracal 631)
The adhesive on removable vinyl is less strong than on permanent vinyl. This means it is ill-suited for things like mugs which are going to get handled and washed often. However, it is ideal for other projects where you want a material that can be removed easily and without damaging the surface. It is most often used for making stencils and wall decals. The vinyl will stick for as long as you need it, but can be removed fairly easily when the time comes.
Heat Transfer Vinyl (HTV)
To apply heat transfer vinyl, you will need a source of heat and pressure. As discussed in the Equipment section above, your options are typically an industrial heat press, Cricut EasyPress, or home iron. By heating the vinyl, you activate the adhesive backing and can then use pressure to stick the vinyl onto the material.
Heat transfer vinyl is typically used on fabrics and can help you customize a wide variety of projects such as t-shirts, milestone blankets, bridal robes, stuffed animals, tote bags, hats, stockings, and more. One of the main manufacturers of heat transfer vinyl on the market is Siser (pronounced Caesar). Their main HTV is called Siser EasyWeed so look for that when shopping from local vinyl suppliers. Cricut’s heat transfer vinyl is called Iron-on vinyl.
There are specialty types of heat transfer vinyl with different finishes or adhesive qualities. SportFlex iron-on vinyl (or Siser EasyWeed Stretch) allows for more flexibility of the material that the vinyl’s being applied to and is useful for making shirts or socks where the fabric may be stretched. You can also get vinyl that’s better for use on heat sensitive materials such as nylon. And of course there are various textures and finishes such as glitter, flock (soft, suede-like texture), foil, etc. To start, just grab some of the regular HTV in a few basic colours.

Time to Get Crafting
I hope that you found this post helpful in introducing you to some of the basic Cricut supplies you’ll need to get started. Cricut machines are so incredibly versatile that I could go on for pages and pages describing all of the different equipment, tools, accessories, and materials available.
If you haven’t bought your machine yet, I recommend taking a look at the Cricut Bundles section before purchasing. You can grab a bundled package at a great price to get yourself equipped with most, if not all, of the things you’ll need to get started with your Cricut once it arrives.
I know that it can be overwhelming learning a new tool or piece of equipment, but I know you’ll love it once you get started and I’m here to help you along the way. If you run into any questions, be sure to reach out and I’ll do my best to help or write another post or tutorial with more information.
If you’re needing more help getting started with your Cricut, be sure to check out the following posts:
- How to Use Cricut Design Space – an explanation of the 6 main functions
- Where to Get SVG Files to Use With Your Cricut
- How to Make Stickers with your Cricut – a step-by-step tutorial

Thanks!